Con l’app ufficiale Lotto e Gratta e Vinci puoi verificare le
vincite, seguire le estrazioni in diretta e giocare on line
Scarica subito la nuova app!
Scarica subito la nuova app!
Inquadra il QR code oppure visita dal tuo smartphone il
sito
mylotteries.it
Inquadra il QR code con il tuo smartphone per aprire il sito
da mobile.
Inquadra il QR code con il tuo smartphone per aprire il sito
da mobile.
Come installare l'app
Come installare l'app
1Visita il sito
mylotteries.it
dal cellulare e premi il pulsante
SCARICA PER ANDROID
2Ti verrà chiesto di scaricare il file
MyLotteries.apk
premi il pulsante
SCARICA*
3Una volta scaricato il file premi il pulsante
APRI e infine
INSTALLA
*Se non hai mai scaricato un'app al di fuori del Play
Store vai su
IMPOSTAZIONI > SICUREZZA
del tuo smartphone e controlla che la voce
"Sorgenti sconosciute"
sia
ATTIVA
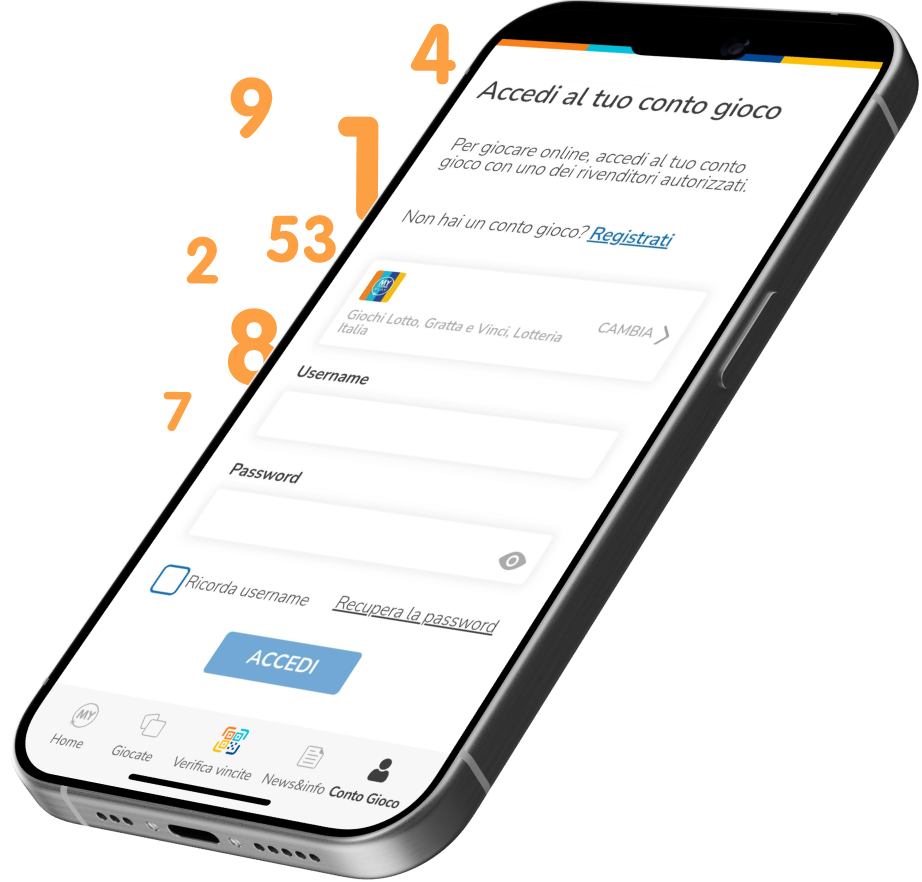
La tua esperienza di gioco in mobilità e in tutta sicurezza.
Con App My Lotteries puoi vivere la tua esperienza a
Lotto,
10eLotto,
MillionDay e
Gratta e Vinci
direttamente dal tuo smartphone dove e quando vuoi. Puoi
verificare se la tua giocata è vincente, compilare comodamente
la tua schedina in app e giocarla nel punto vendita, consultare
in qualsiasi momento gli ultimi numeri estratti nella sezione
archivio delle estrazioni e giocare online.
Con l’App My Lotteries puoi controllare se hai vinto semplicemente
inquadrando il biglietto Gratta e Vinci e lo scontrino del 10eLotto,
Lotto e MillionDAY nella sezione Verifica Vincite.
1509 Dvbt2 512m Firmware Update ((link)) -
Do not download the first file you see. Installing the wrong firmware can hard-brick your receiver (making it unusable). Follow these steps:
Open your device or check the system menu. The firmware must match the printed mainboard model (e.g., HSP09G1S0-A , T2_1509_KEY_V1.2 ), not just the box it came in.
Wait for the progress bar to reach 100%. The box will . Method B: Auto-Force Update (For "Bricked" Boxes) If your box won't boot, try this: Unplug the power from the TV box. Insert the USB drive with the flash.bin file. Plug the power back in.
– In some countries (e.g., India after DD Free Dish changes, or certain European DVB-T2 pay packages), channels change CAIDs (Conditional Access Identifiers). Old firmware lacks the keys. No update = black screen on formerly free channels.
That said, if your 1509 box is already working perfectly on all channels and you do not use USB media playback, . The old adage applies: “If it ain’t broke, don’t fix it.” But if you face any of the issues described in Part 2, performing this update is the most cost-effective fix—often cheaper than buying a new receiver.
Open the receiver shell and locate the three or four header pins marked on the motherboard. Connect them to your USB-to-TTL adapter using a cross-over configuration: Receiver TX →right arrow Adapter RX Receiver RX →right arrow Adapter TX Receiver GND →right arrow Adapter GND
Copy the extracted .bin firmware file directly to the root directory of the USB drive. Do not place it inside any folders. Step 2: Execute the Firmware Upgrade
Eliminates random reboots, UI lag, and freezing.
Do not download the first file you see. Installing the wrong firmware can hard-brick your receiver (making it unusable). Follow these steps:
Open your device or check the system menu. The firmware must match the printed mainboard model (e.g., HSP09G1S0-A , T2_1509_KEY_V1.2 ), not just the box it came in.
Wait for the progress bar to reach 100%. The box will . Method B: Auto-Force Update (For "Bricked" Boxes) If your box won't boot, try this: Unplug the power from the TV box. Insert the USB drive with the flash.bin file. Plug the power back in.
– In some countries (e.g., India after DD Free Dish changes, or certain European DVB-T2 pay packages), channels change CAIDs (Conditional Access Identifiers). Old firmware lacks the keys. No update = black screen on formerly free channels.
That said, if your 1509 box is already working perfectly on all channels and you do not use USB media playback, . The old adage applies: “If it ain’t broke, don’t fix it.” But if you face any of the issues described in Part 2, performing this update is the most cost-effective fix—often cheaper than buying a new receiver.
Open the receiver shell and locate the three or four header pins marked on the motherboard. Connect them to your USB-to-TTL adapter using a cross-over configuration: Receiver TX →right arrow Adapter RX Receiver RX →right arrow Adapter TX Receiver GND →right arrow Adapter GND
Copy the extracted .bin firmware file directly to the root directory of the USB drive. Do not place it inside any folders. Step 2: Execute the Firmware Upgrade